Table of Contents
How To Install Y1 Smart Electronic Door Locks?
If you don’t know how to install a smart electronic door lock, here are a few steps to do it the easy way.
Applies to: Y1 Smonet smart door locks
Installation video:
1. Verify Your Door Dimensions
Before installation, confirm your door’s suitability. Check for the following dimensions:
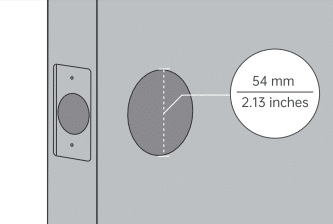
Step 1. Cross bore diameter: 54 mm (2.13 inches)
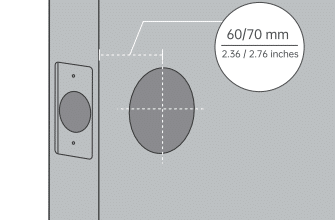
Step 2. Backset:60 /70 mm (2.36 / 2.76 inches)
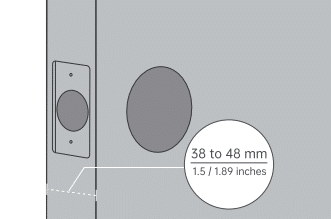
Step 3. Door thickness: 38 to 48 mm (1.5 / 1.89 inches )
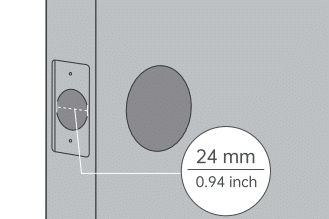
Step 4. Edge bore diameter: 24 mm (0.94 inch)
2. Install Electronic Door Lock
Step 1. Install the deadbolt
- For 60mm backset doors, install the deadbolt without adjustments.

- For 70mm backset doors, extend the deadbolt length. Rotate the cover upwards, extend the deadbolt, then secure it in place.

- Insert the retracted deadbolt with the word “UP” and up arrow facing upwards.
Note: The arrow on deadbolt must stay up, arrow down is going to fail the installation.
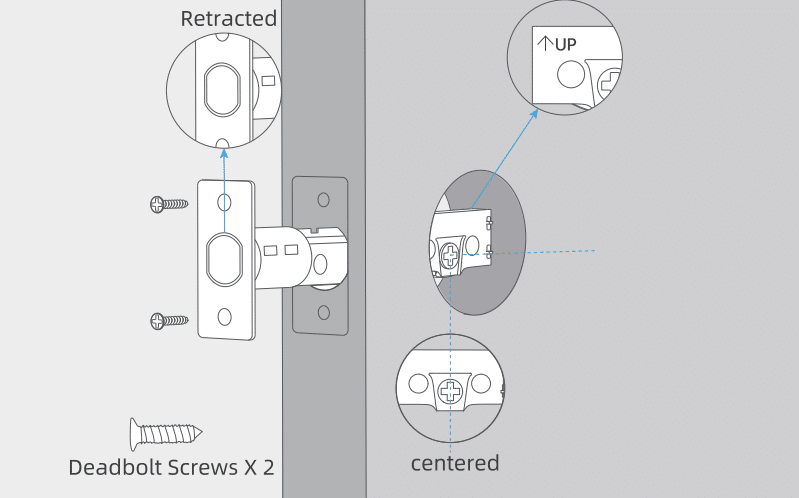
Secure with screws using a Philips screwdriver (not provided).
Parts Required: Deadbolt, Deadbolt Screws, Philips Screwdriver (not provided).
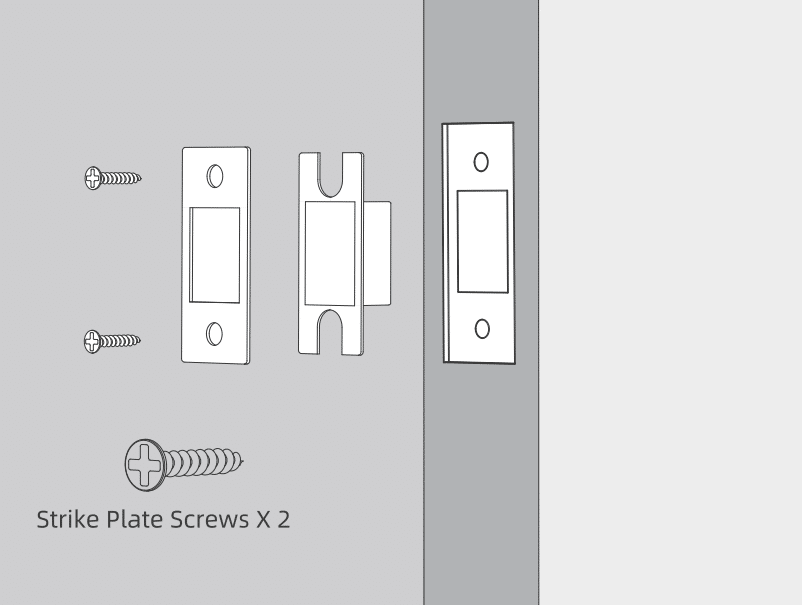
Step 2. Install the Strike Plate
Put the strike pad into the door frame first, and then screw the strike plate in place.
Parts Required: Strike Plate, Strike Pad, Strike Screws, Screwdriver
Step 3. Install the Exterior Assembly
- Insert the spindle horizontally.
- Test the deadbolt movement by turning the spindle.
- Pass the cable under the deadbolt. Ensure the deadbolt is retracted during installation.
Note: Keep the deadbolt retracted (in unlocked status) and do not insert any keys during installation.
Parts Required: Exterior Assembly
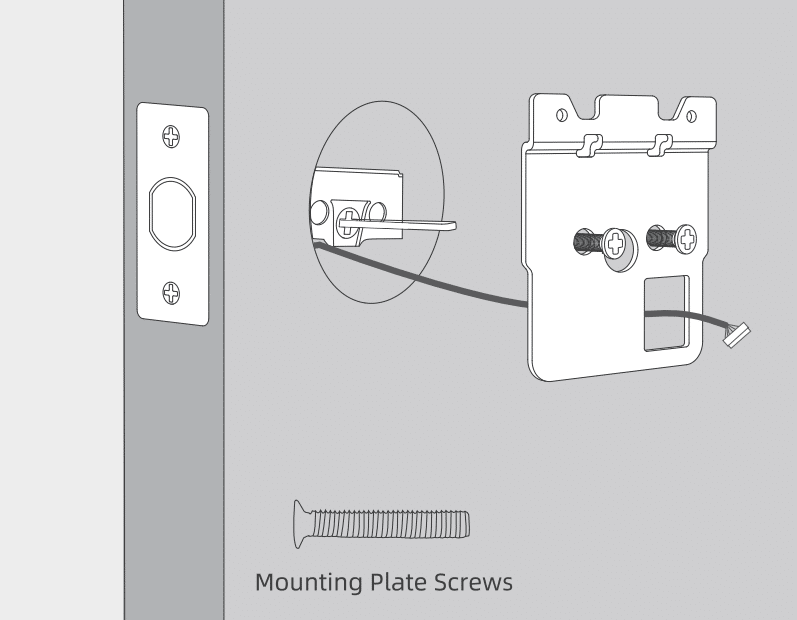
Step 4. Install the Mounting Plate
- Pass the spindle through the central hole and the cable through the right bottom hole.
- Screw the mounting plate firmly while ensuring proper alignment.
Note: Please keep the exterior assembly straight when installing the mounting plate.
Parts Required: Mounting Plate, Mounting Plate Screws, Screwdriver ( not provided)
Step 5. Install the Interior Assembly
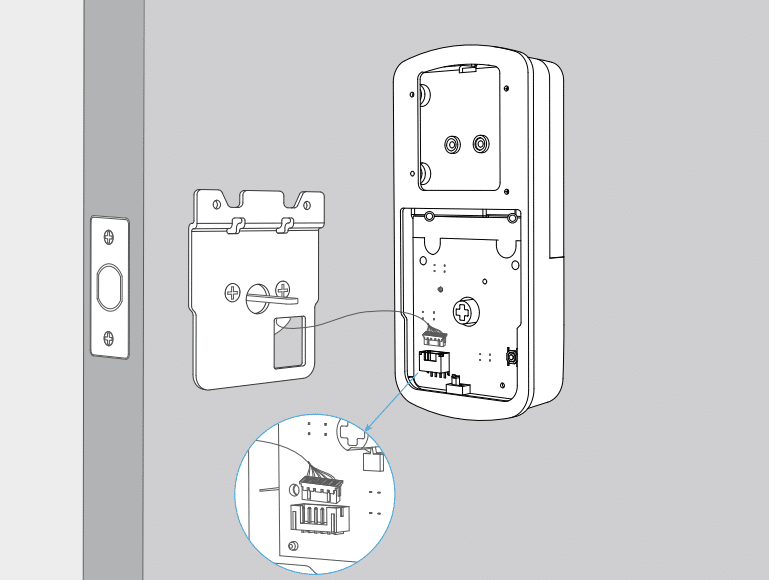
- Plug the cable into the port on the circuit board. Make sure the connector is securely matched with the pins.
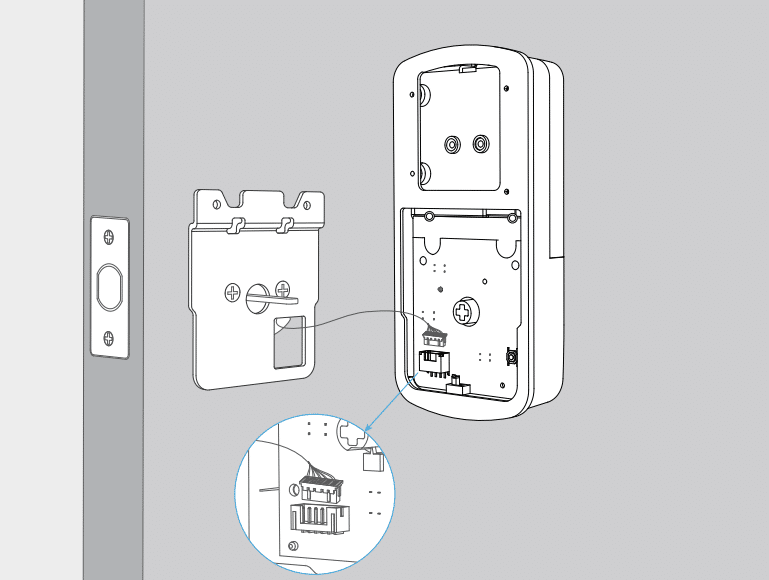
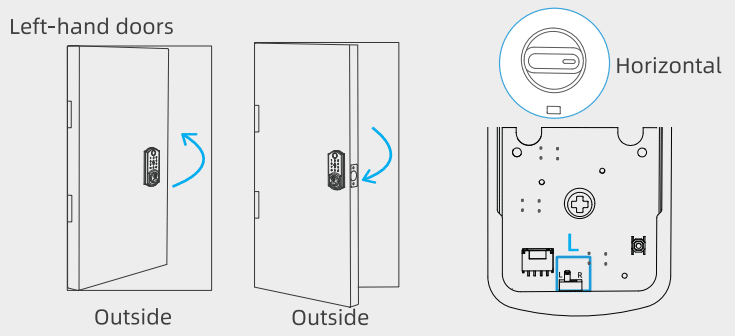
- Face the door from the outside.
If the hinge is on the left, the door is left-handed. Please push the direction button on the circuit board to “L”, turn the door knob to be horizontal.
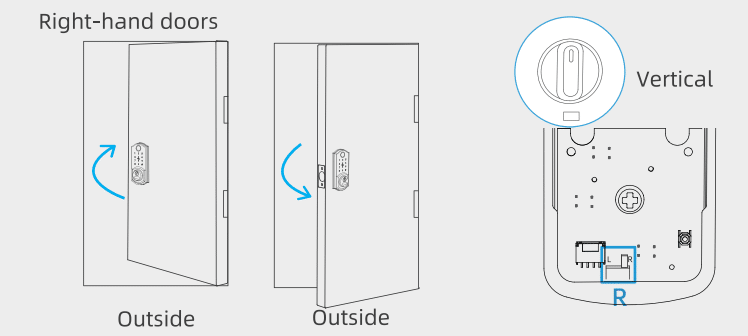
If the hinge is on the right, the door is right-handed. Please push the direction button on the circuit board to “R”, turn the door knob to be vertical.
- Face the door from the outside.
If the hinge is on the left, the door is left-handed. Please push the direction button on the circuit board to “L”, turn the door knob to be horizontal.

If the hinge is on the right, the door is right-handed. Please push the direction button on the circuit board to “R”, turn the door knob to be vertical.
- Screw the interior assembly.
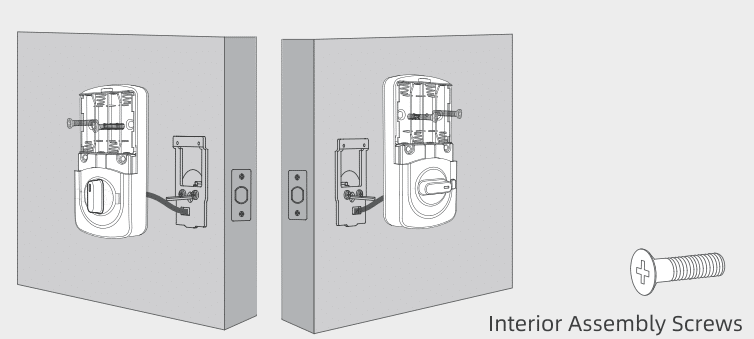
Parts Required: Interior Assembly, Interior Assembly Screws, Screwdriver (not provided)
Step 6. Insert the Batteries
Note: Use new, non-rechargeable alkaline batteries only.
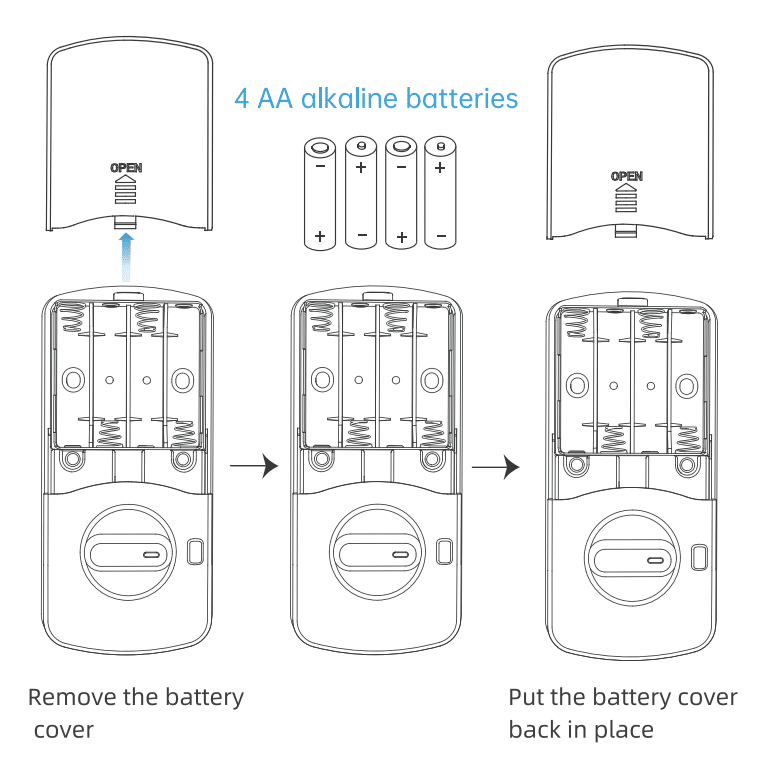
Upon completing these steps, your smart door lock installation is finished.


