Table of Contents
How To Install H1-BF Smart Locks With Handle?
In this post-sale guide, We will show you how to install the Smonet Smart Lock and the steps it takes to install it.
Applies to: Smonet Smart Locks With Handle
Step 1: Install the Latch
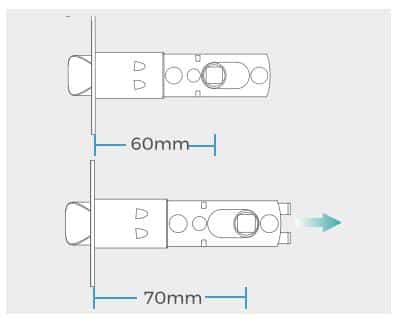
1. If your door has a 60mm/2%" backset, you can install the latch without any adjustments.
2. For doors with a 70mm/ 2%"backset, pull the latch to extend its length.
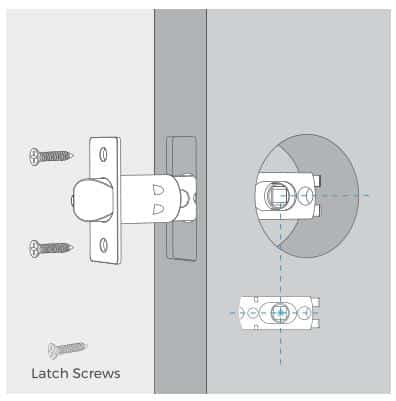
3. Insert the latch with its tongue facing inside if your door opens outward.Insert the latch with its tongue facing outside if your door opens inward.
4. Screw the latch with a Philips screwdriver (not provided).
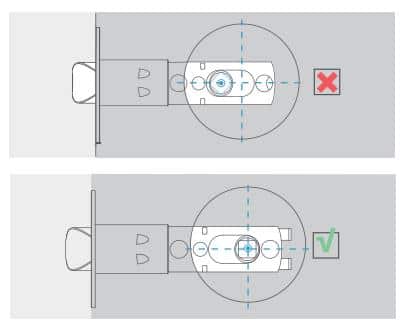
Note: Please ensure the center hole is square, not diamond-shaped.
Parts Required: Latch, Latch Screws, Philips Screwdriver.
Step 2: Install the Strike Plate
Put the strike pad into the door frame first, and then screw the strike plate in place.
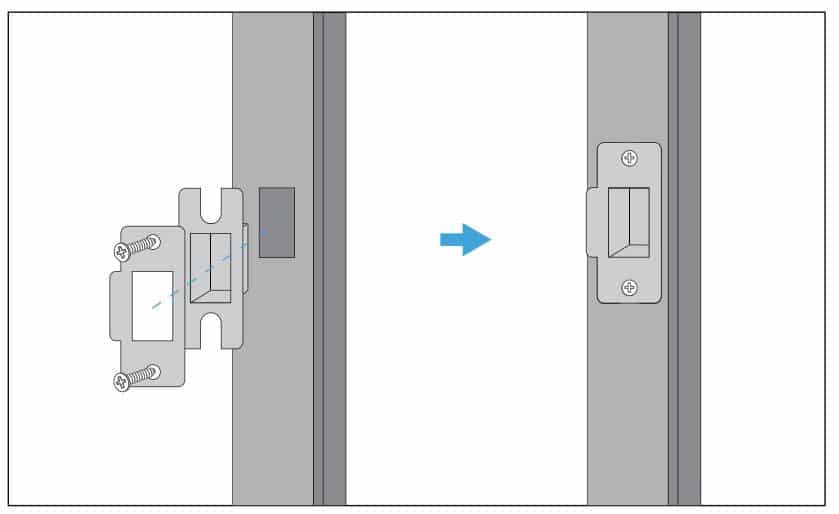
Parts Required: Strike Plate, Strike Pad, Strike Screws, Philips Screwdriver.
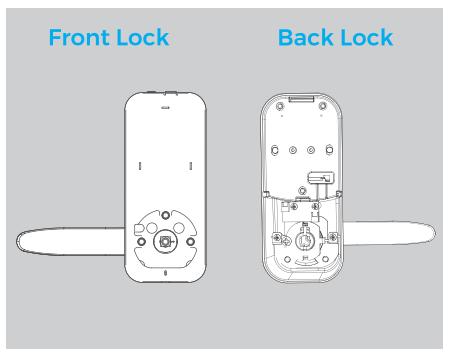
Step 3: Adjust the Handle Direction
1. Use a Phillips screwdriver to remove the screws in the front and back handles.
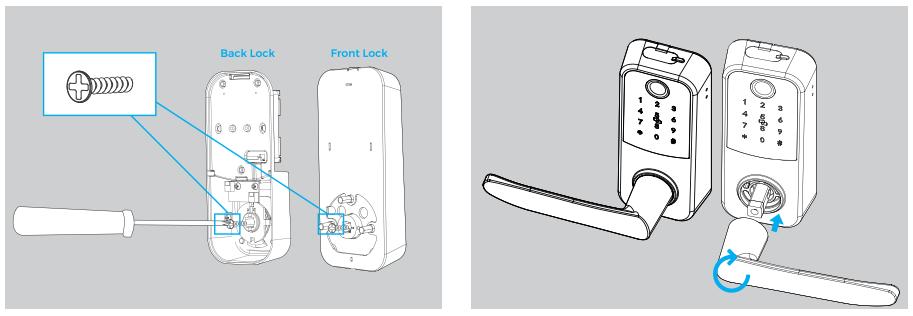
2. Face the door from the outside.
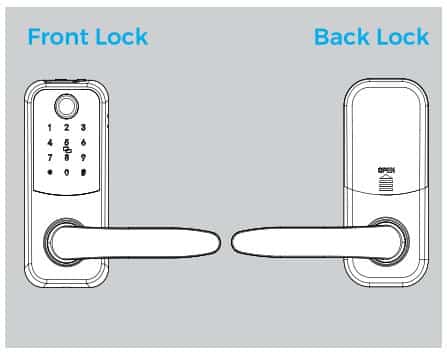
Left hand door (Hinge on the left): Turn the Front handle to Left Turn the Back handle to Right.
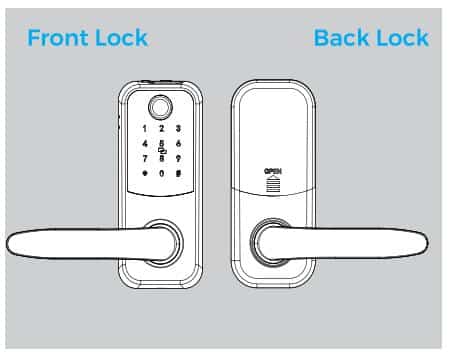
Right hand door (Hinge on the right): Turn the Front handle to Right Turn the Back handle to Left.
3. Tighten the screws to hold the handles in place.
Step 4: Install the Exterior Assembly
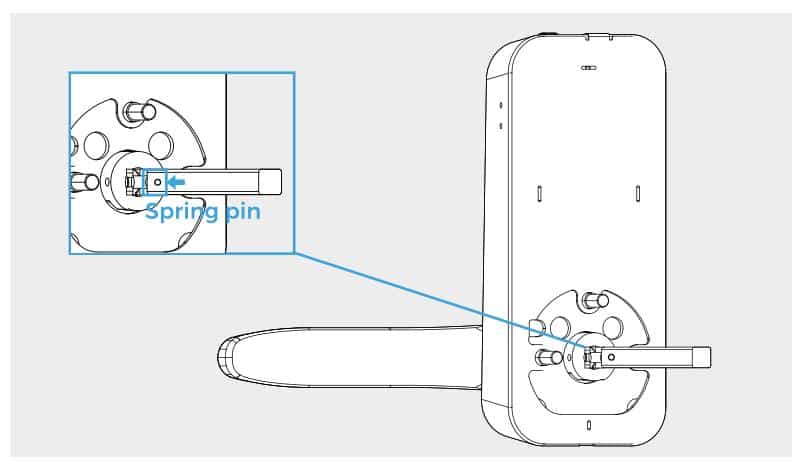
1. Insert the spindle while pressing the spring pin.
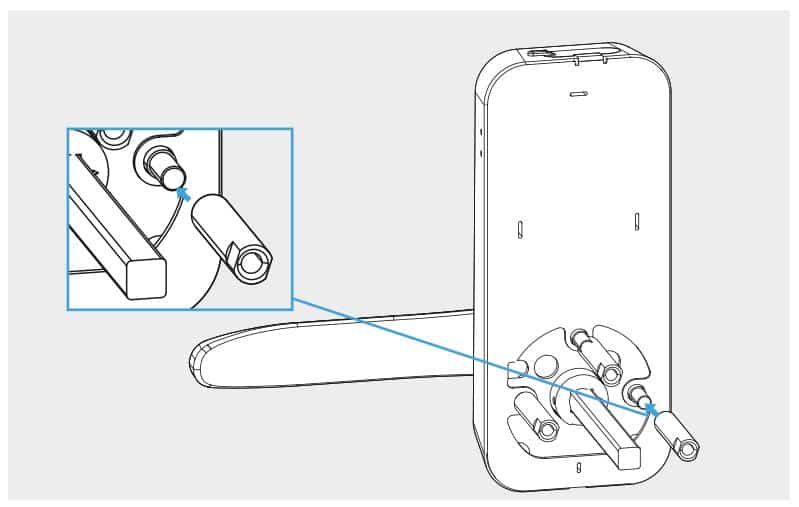
2. Install the screw casings by turning them clockwise.
3. Install the exterior assembly while passing the cable under the latch.
Part Required: Gold Screw Casing, Spindle, Exterior Assembly.
Step 5: Install the Mounting Plate
1. Pass the spindle through the center hole and cable through the top left hole.
2. Screw the mounting plate firmly while ensuring proper alignment.
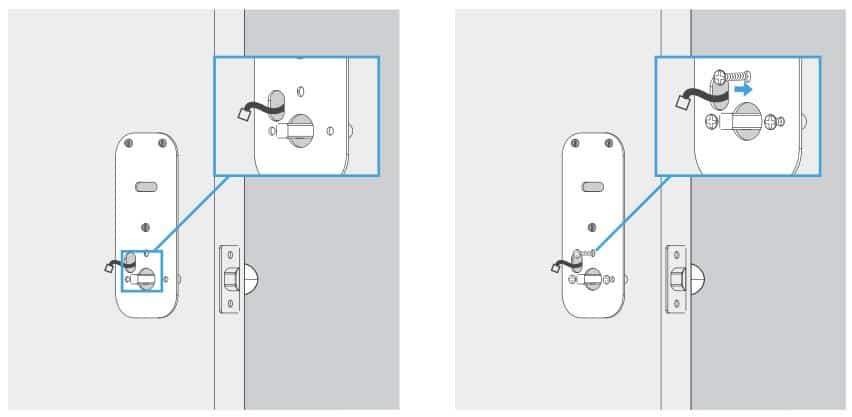
Note: Please keep the exterior assembly straight when installing the mounting plate.
Parts Required: Mounting Plate, Mounting Plate Screws, Philips Screwdriver.
Step 6: Install the Interior Assembly
1. Connect the cable and put the excess part into the top left hole.
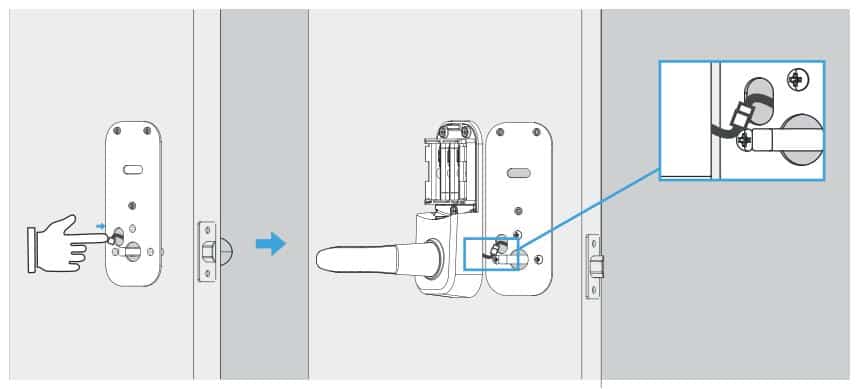
2. Screw the interior assembly.
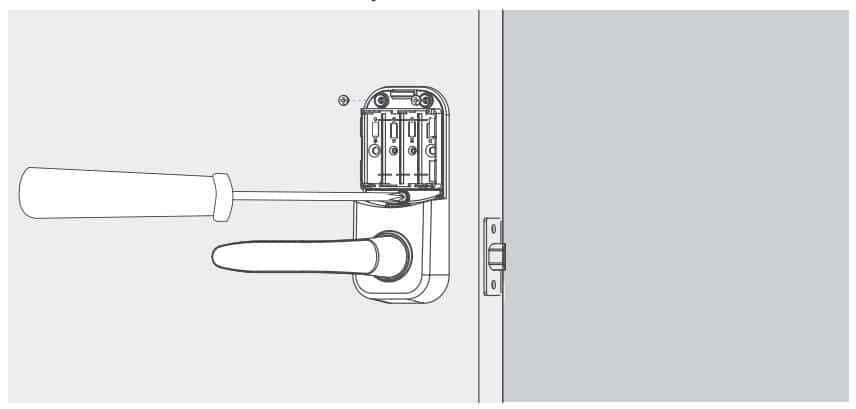
Parts Required: Interior Assembly, Interior Assembly Screws, Philips Screwdriver.
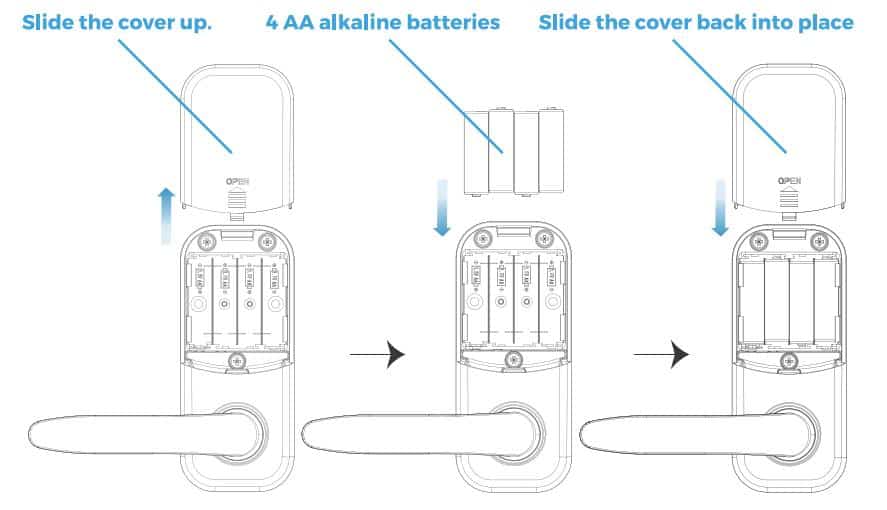
Step 7: Insert the Batteries
Note: Use new, non-rechargeable alkaline batteries only.
